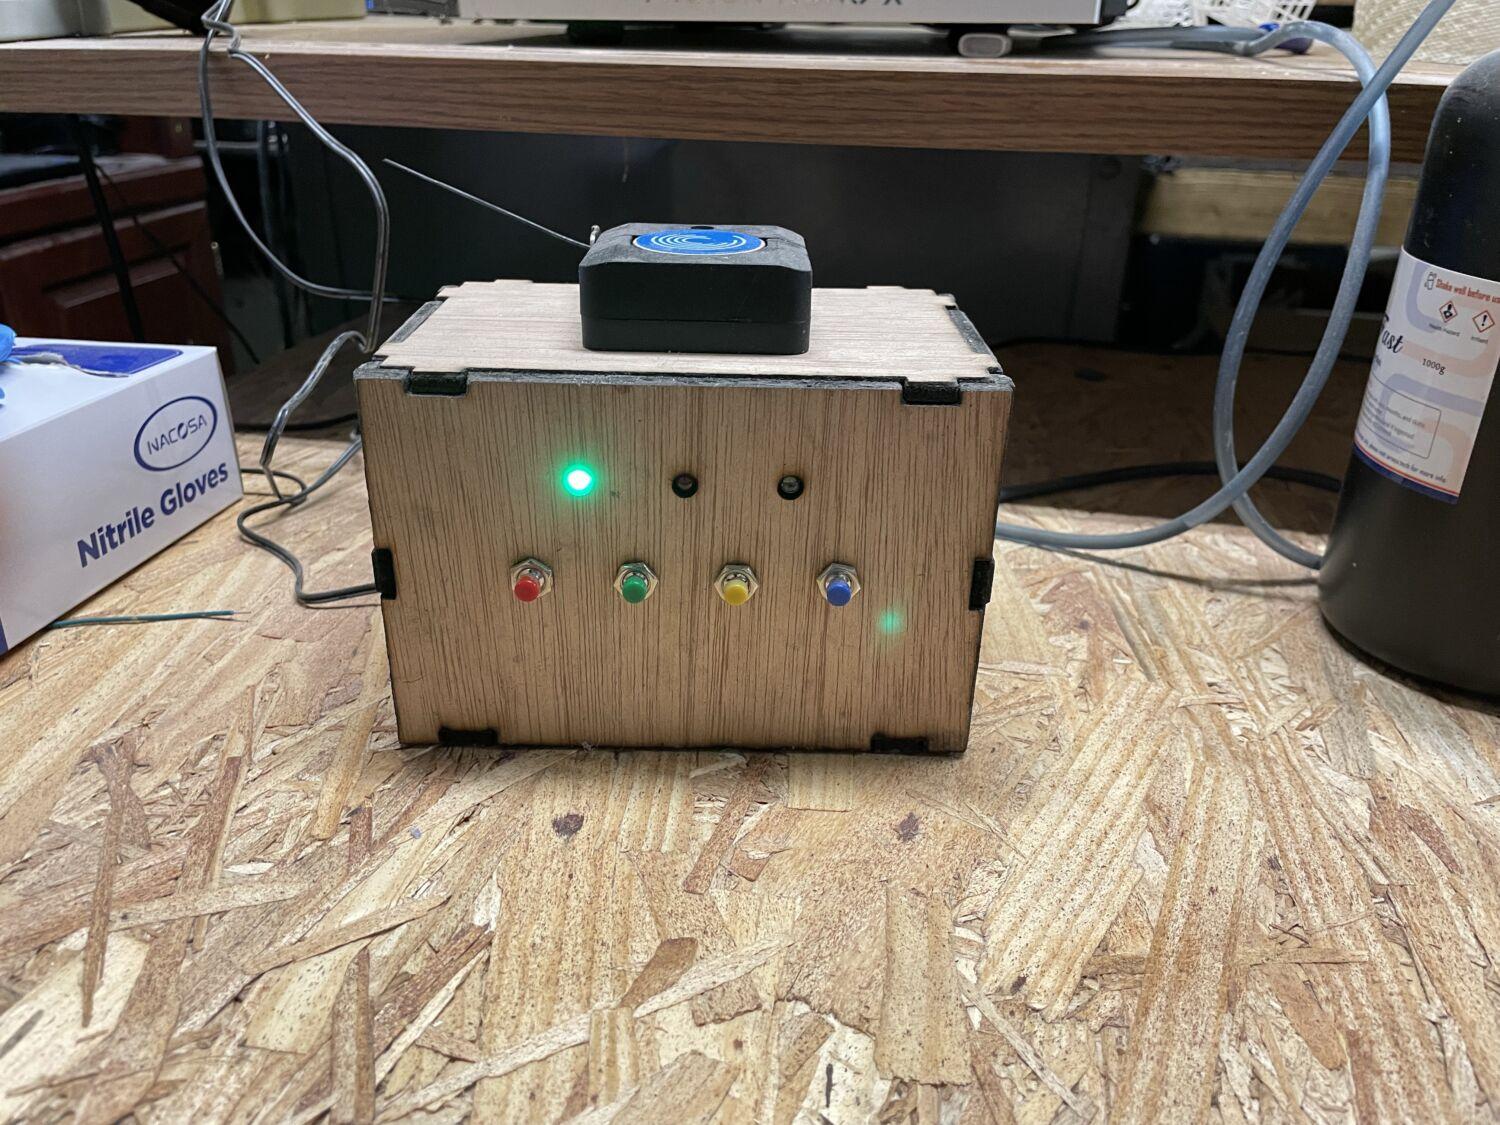
The 3D Printer
The Anycubic Photon is a line of LCD 3D Printers. I have the Anycubic Photon Mono X. Why does it need an auto filler? Here’s a little background on how it works:
An LCD DLP 3D printer, often referred to as a resin-based 3D printer, utilizes a technology called Digital Light Processing (DLP) or Liquid Crystal Display (LCD) to create three-dimensional objects from liquid resin. These printers are commonly used for creating high-resolution and intricate models, jewelry, dental molds, and other small-scale objects with fine details. Here’s how an LCD DLP 3D printer works:
- Build Platform and Resin Tank Setup: The printer consists of a build platform and a resin tank. The build platform is where the object is gradually constructed layer by layer. The resin tank holds the liquid photopolymer resin, which becomes solid when exposed to specific wavelengths of light.
- Resin Material: The resin used in these printers is a specialized photopolymer resin that reacts to light exposure. It’s designed to solidify when exposed to light of a certain wavelength, usually in the UV range.
- Layer Slicing: Just like other 3D printers, the 3D model is first sliced into thin horizontal layers using slicing software. Each layer is then converted into a series of 2D images.
- Projection and Masking: In both LCD and DLP variations of the technology, each layer’s 2D image is projected onto the surface of the resin inside the tank. The main difference lies in how the light is projected.
- LCD (Liquid Crystal Display): In an LCD-based 3D printer, the build area is equipped with an LCD screen that consists of an array of tiny pixels. Each pixel can be turned on or off independently. When a layer is projected onto the resin, the LCD screen acts as a mask, allowing UV light to pass through the transparent pixels and blocking it where pixels are opaque. This selectively exposes the resin to light, causing it to solidify only in the desired areas.
- DLP (Digital Light Processing): In a DLP-based 3D printer, a digital micromirror device (DMD) chip is used instead of an LCD. The DMD chip consists of thousands to millions of microscopic mirrors, each of which can tilt to direct UV light either toward the resin or away from it. The pattern of tilted and tilted mirrors creates the necessary light and shadow patterns to solidify the resin layer by layer.
- Layer Solidification: The projected light causes the liquid resin to solidify or polymerize, adhering to the build platform. The solidified layer forms the base for the subsequent layer to be added on top.
- Z-Axis Movement: Once a layer is solidified, the build platform moves slightly upward (along the Z-axis) to make space for the next layer of liquid resin.
- Repeating the Process: The process of projecting a layer, solidifying the resin, and moving the build platform upward is repeated for each subsequent layer. This layer-by-layer approach gradually builds the three-dimensional object.
- Post-Processing: After the printing process is complete, the object is carefully removed from the build platform. Depending on the resin used, the object might require additional post-processing steps such as washing in a solvent to remove excess resin and then curing under UV light to ensure complete polymerization.
Overall, LCD DLP 3D printers offer high-resolution printing with intricate details, making them suitable for applications where precision is crucial. The use of liquid resin allows for smooth surfaces and fine features that might be challenging to achieve with filament-based Fused Deposition Modeling (FDM) 3D printers.

The Auto-Filler
An autofiller, also known as an automatic resin dispenser or resin top-off system, is a feature found in some LCD 3D printers that helps maintain a consistent level of resin in the resin tank throughout the printing process. The purpose of an autofiller is to enhance the overall printing experience and reduce the need for manual intervention during long or complex print jobs. Here’s why an auto filler is useful for an LCD 3D printer:
- Minimizes User Intervention: During a 3D printing job, especially for larger or longer prints, the resin in the tank can gradually deplete as each layer is solidified. Without an autofiller, users might need to monitor the resin level regularly and manually add more resin to prevent the printer from running out of material. An autofiller automates this process, reducing the need for constant monitoring and intervention.
- Consistent Print Quality: Maintaining a consistent resin level is crucial for achieving consistent print quality. If the resin level drops too low, it can lead to improper layer exposure and incomplete curing, resulting in defects or failed prints. An autofiller ensures that the proper resin level is maintained, which in turn helps ensure that each layer of the print receives the appropriate amount of light exposure for accurate curing.
- Long Unattended Prints: Some 3D prints can take many hours or even days to complete, making it impractical for users to continuously monitor and refill the resin tank. An auto filler enables users to initiate long print jobs and leave the printer unattended with confidence, knowing that the system will automatically replenish the resin as needed.
- Time Efficiency: For professional users or businesses, time is of the essence. An autofiller can save valuable time by eliminating the need to pause the printing process, open the printer’s cover, and manually add resin. This can be especially important in settings where multiple prints are queued up back-to-back.
- Reduced Material Waste: If a print job runs out of resin due to insufficient monitoring, it can result in a failed print that wastes both time and material. An autofiller helps prevent such failures, reducing material wastage and the associated costs.
- User Convenience: The convenience of an auto filler is a significant advantage, especially for users who are less experienced with 3D printing or for those who prefer a more hands-off approach. It simplifies the printing process and makes it more accessible to a wider range of users.
- Optimized Print Success: In 3D printing, success is often determined by the accuracy of the printing process. An autofiller contributes to the printer’s reliability and the likelihood of successful prints by maintaining optimal printing conditions consistently.
While an auto-filler is a valuable feature, not all LCD 3D printers come equipped with it. Users should consider their specific printing needs and the importance of unattended and consistent printing when selecting a printer with or without an auto-filler.
The Homemade Auto-Filler
At the time of creation, I had to print some large parts for work and the 9-hour print that used 430 mL of resin. This was much too large to fit in the 200mL tank, plus I was either asleep or at work for a large portion of the print and wouldn’t be able to refill it.
Some resin auto-fillers use an air pump to pressurize the container of resin, then the pressure forces resin up a tube and out into the vat. This is advantageous because no pumps interact with a resin that can be damaging to other plastics and metals. However, the is no reference to how much resin has entered the vat, especially if the resin bottle leaks. I chose to go with a different route as I need to have an exact amount added to the vat.
I chose a specific type of pump called a peristaltic pump, as it does not mix the fluid being pumped with any pump parts.
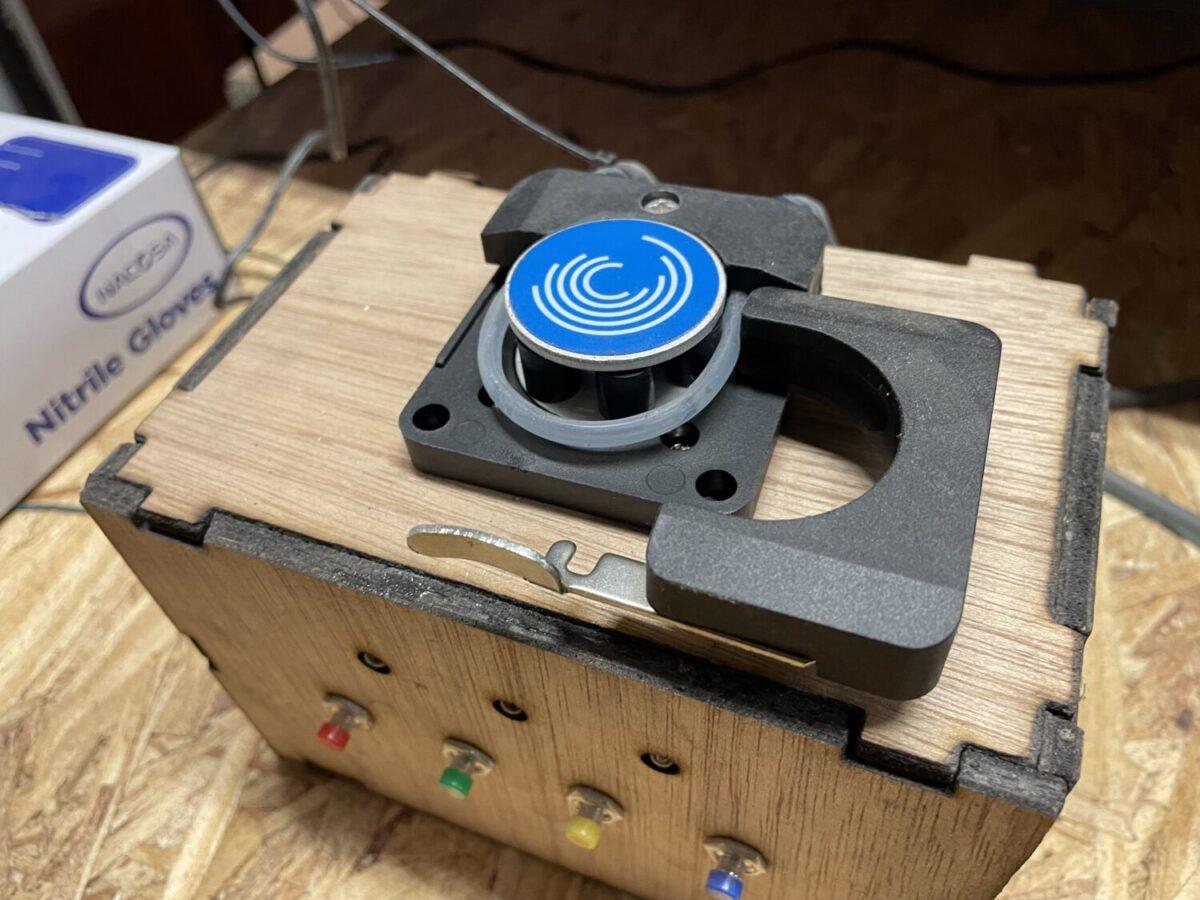
Peristaltic Pumps
A peristaltic pump is a type of positive displacement pump that serves the purpose of moving fluids, typically liquids, from one location to another. It operates using a mechanism called peristalsis, which mimics the way certain biological systems, such as the digestive system, move substances through a series of rhythmic contractions. The primary purpose of a peristaltic pump is to provide a controlled and gentle method of transferring fluids without contaminating the pump or the fluid being pumped. Here’s a breakdown of its purposes and advantages:
- Accurate Fluid Transfer: Peristaltic pumps are known for their accuracy in fluid transfer. The pumping action relies on squeezing a flexible tubing or hose using rollers or rollers that rotate around a central axis. This mechanism provides consistent and precise fluid delivery, making them suitable for applications that require accurate dosing or measurement.
- Non-Contaminating and Sterile: The fluid being pumped only comes into contact with the tubing or hose, and there are no internal components that directly touch the fluid. This design prevents cross-contamination between different fluids and minimizes the risk of contamination of the pump itself. This property is especially crucial in medical and laboratory applications, where maintaining a sterile environment is essential.
- Gentle Pumping Action: The peristaltic pumping action is gentle, as it involves the compression and relaxation of the tubing without exposing the fluid to excessive shear forces or agitation. This makes peristaltic pumps suitable for handling delicate fluids, sensitive biological samples, and viscous liquids without causing damage.
- Versatility of Fluids: Peristaltic pumps can handle a wide range of fluids, from corrosive chemicals to biological solutions, without the risk of chemical reactions or fluid degradation. The compatibility of the tubing material with the fluid being pumped is crucial, but many options are available to accommodate different fluid types.
- Easy Maintenance: Since the fluid only touches the tubing or hose, maintenance is relatively straightforward. When the tubing needs to be changed or cleaned, it’s a simple process that doesn’t involve complex disassembly and cleaning of internal components.
- Adjustable Flow Rates: The flow rate of a peristaltic pump can be easily adjusted by changing the speed of the rollers or the size of the tubing. This flexibility allows users to control the flow rate according to their specific requirements.
- Reduced Clogging Risk: The tubing used in peristaltic pumps is typically less prone to clogging compared to traditional pumps with internal components. This is beneficial when handling fluids that contain particles or debris.
- Remote Operation and Automation: Peristaltic pumps can be easily integrated into automated systems or operated remotely. This feature is valuable in applications where precise and controlled fluid transfer is required without constant manual intervention.
Peristaltic pumps find applications in a wide range of industries, including medical and pharmaceutical research, biotechnology, food and beverage processing, environmental monitoring, industrial chemistry, and more. Their ability to provide accurate and contamination-free fluid transfer makes them an essential tool in situations where precision and reliability are paramount.
The Pump I Used
Peristaltic Pump: https://www.amazon.com/gp/product/B084TFCP5Q/ref=ppx_yo_dt_b_search_asin_title?ie=UTF8&psc=1

I chose this peristaltic pump from Amazon that has a stepper motor attached. I can accurately drive the stepper motor with an Arduino and this means the pump will move a consistent amount of resin over time. Therefore the control system can be a time-based system. Some resin fillers use a conductive test to measure the height of the resin, but this would not work well with the shape of the resin vat.
Stepper Motor Driver
Stepper motor driver used in this project: https://www.amazon.com/gp/product/B07S64MBTR/ref=ppx_yo_dt_b_search_asin_title?ie=UTF8&psc=1

I chose this enable/direction/step stepper motor controller for the project because I already had it on hand. Additionally, the driver is very simple to operate from the microcontroller end as it handles the step sequencing and can also limit motor current. The microcontroller only has to set the rotation direction via the direction pin, high or low, and then pulse the step pin to move the motor a set distance.
The Controller
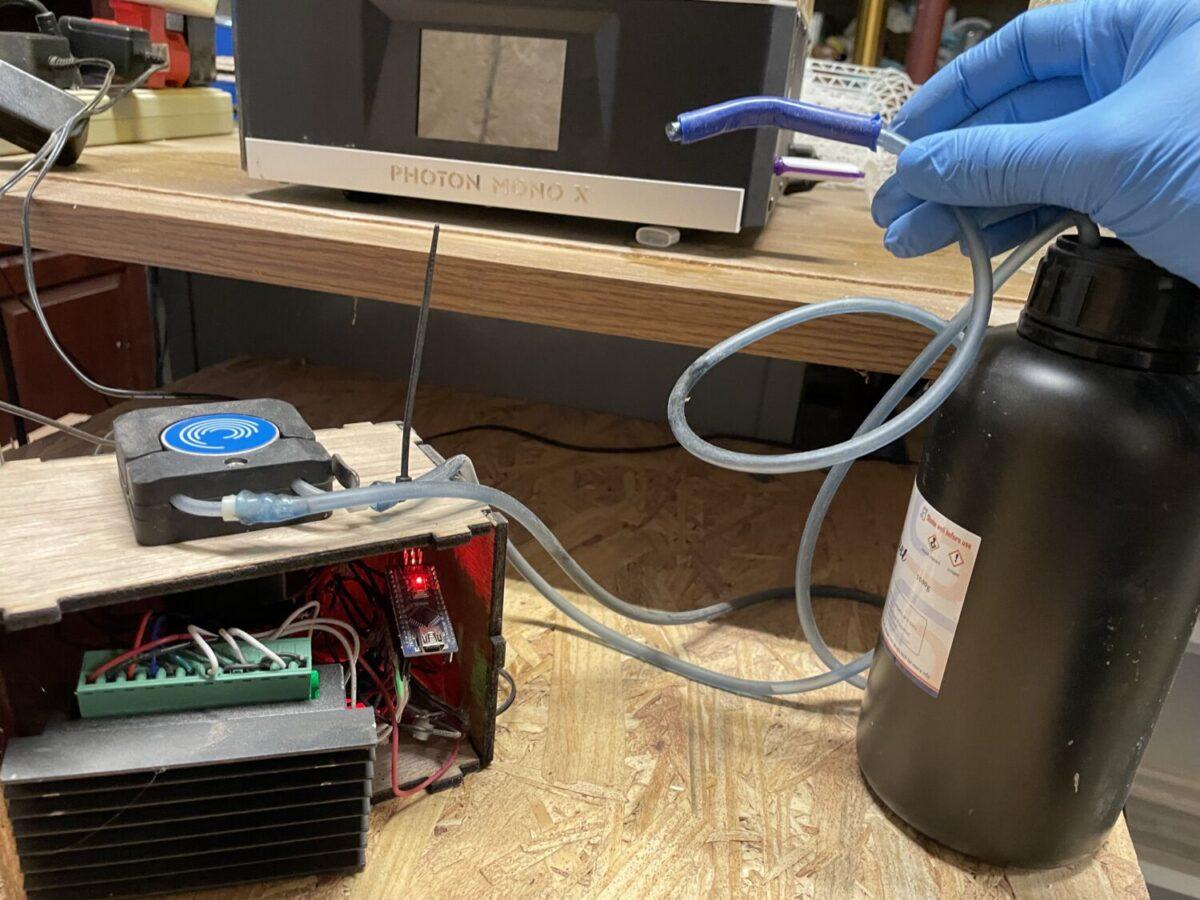
The auto filler I built uses an Arduino Nano. It’s one of the smallest Arduinos but still has more than enough program memory and IO. However, the program will work with any Arduino, and with most Arduino IDE-compatible boards.
In this project, the micro-controller’s purpose is to accept inputs from the user via pushbuttons, and output indicator lights and motor driving pulses as required. The current version requires a re-flash of the program when changes to the autofill cycle are required, but a future update may improve the human-machine interface with a screen of some sort.
The code is available here along with the part files for the enclosure I made. Note that the parts I picked out do not fit in the enclosure correctly.
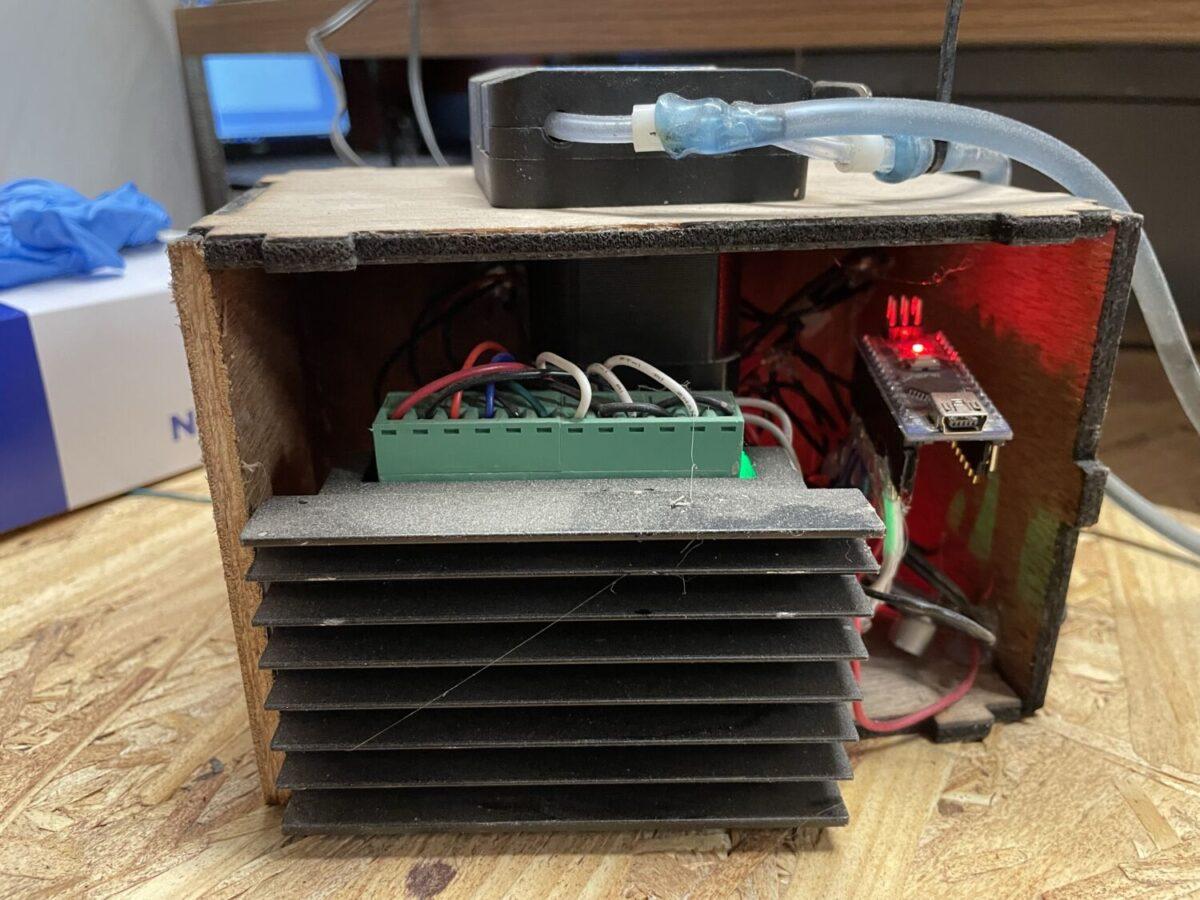
Assembly and Use
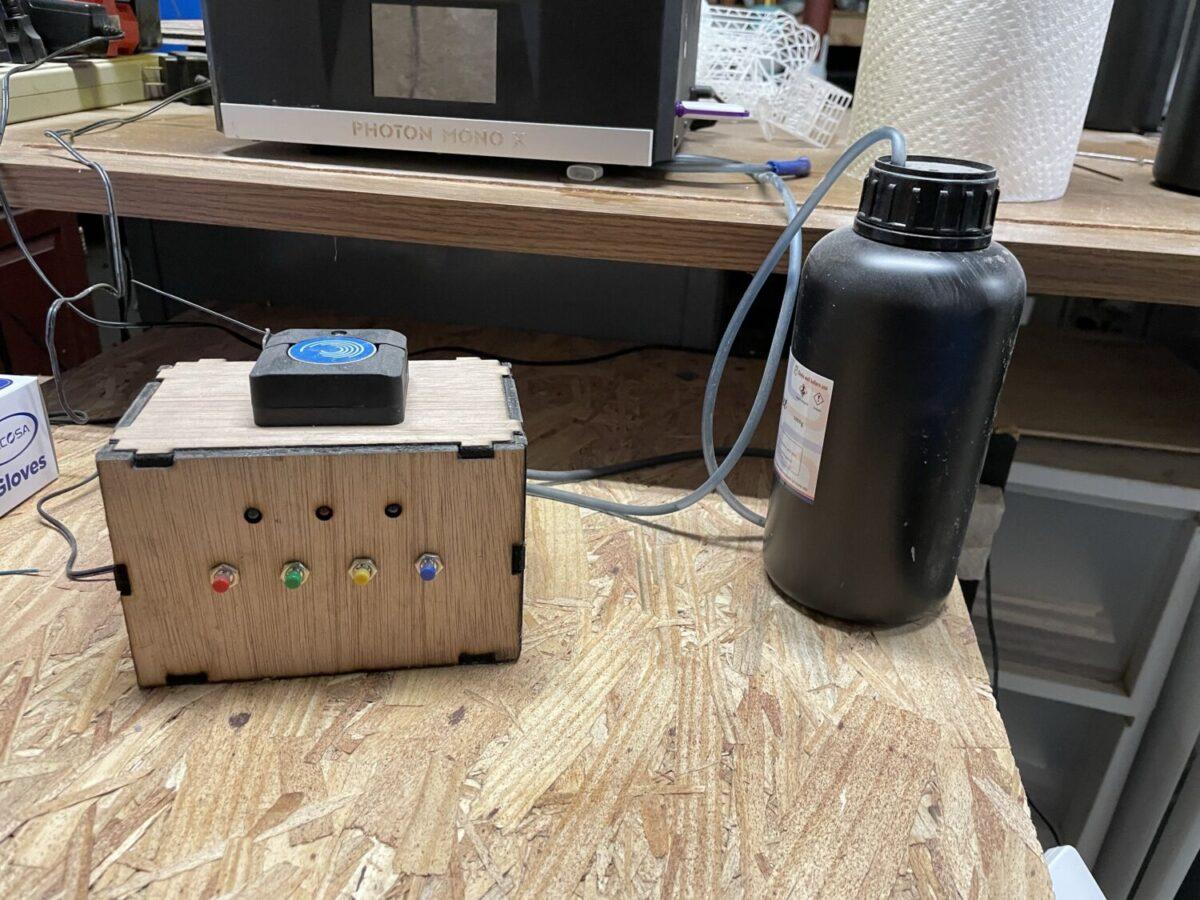
With the project ready to make, I purchased the parts required and laser-cut a housing out of plywood.
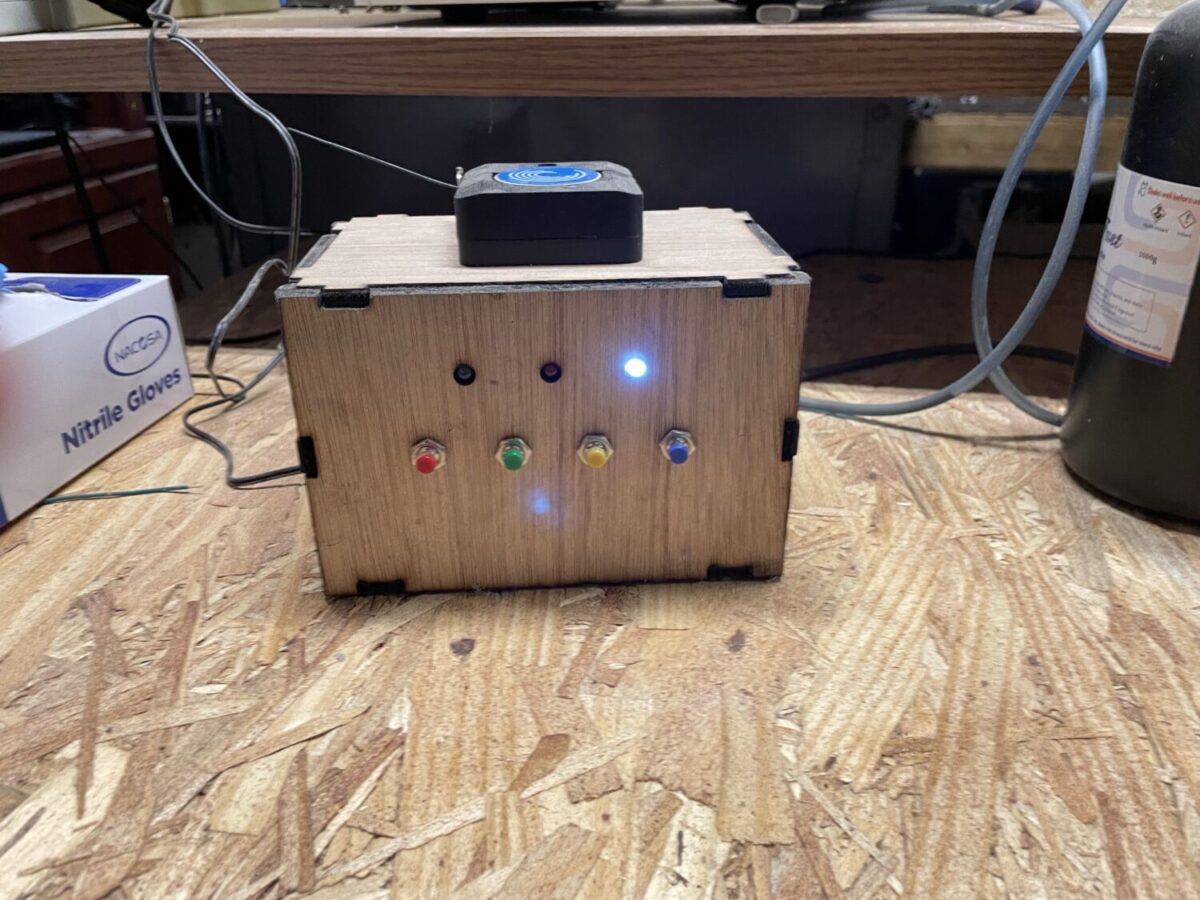
The design wasn’t big enough for the stepper motor driver to fit, so I let it hang out where the back panel should be. Then I soldered all the required connections from the buttons and LEDs to the Arduino, plus connected the stepper motor and driver circuit. The stepper motor needs 12V power, so a 12V 1A wall wart power supply was used. The power comes into the enclosure and then is split, one into the motor driver, and two stepped down for the Arduino. After fixing a couple of quick mistakes, it was time to calibrate the machine.
Calibration
The whole idea was the pump would push a specific amount of resin in over a given time, so I needed to measure this for the program. I got a container, found its volume in milliliters, and then proceeded to time how long it took the pump to fill the container. It took the pump 239 seconds to fill the 54ml container to the brim meaning, the pump moved a whopping .225 milliliters per second.
Now this is slow. But it’s still faster than the printer consumes resin, so it’s suitable for the task. This value can be entered into the code along with the print volume, print runtime, as well as how many times should the resin be refilled. The program calculates the timing from this at run time (technically as it is compiled), and then uses those timings to refill the tank.
I was able to test this a great number of times, and it worked well enough for me to use in production. The auto filler ran 5 430ml batches over 9 hours each, and the tank was essentially at the same level the entire time.
Conclusions
Is this auto-filler worth it? Probably not. You can purchase an auto filler that uses a closed loop method for filling the tank for the same amount the parts for this project cost, here. It has the advantage that it doesn’t need to be reprogrammed for every job, but it can’t accidentally overfill the tank from miscalculation.
However, this certainly was a fun exercise, and it predated the consumer auto filler I linked to above. It served its purpose, plus it was a learning opportunity for using: Arduinos, digital motion control, stepper motors, and peristaltic pumps.
More Reading
Check out other projects and posts here!
